What is a Tilt Sensor?
A tilt sensor detects the inclination or tilt angle of an object or surface. It measures the deviation from a horizontal or vertical position, ensuring stability and safety. These sensors use technologies such as mercury switches, accelerometers, and gyroscopes to detect and quantify tilt.
Tilt sensors play a critical role in various industries, including construction, heavy equipment, robotics, aerospace, and automotive. They provide real-time data on an object’s orientation and stability. As a result, they help prevent accidents by triggering alerts or corrective actions when a tilt is detected.
How Does a Tilt Sensor Work?
A tilt sensor, also known as a tilt switch or inclinometer, operates based on the principle of a conductive ball switch or mercury switch.
Conductive Ball Tilt Sensor
In this type of sensor:
- A small conductive ball inside a chamber moves with the tilt.
- Contact points detect its position and complete or break the electrical circuit.
- A microcontroller interprets the change in state and triggers an action.
Mercury Tilt Sensor
- This type contains a glass bulb filled with mercury, a conductive liquid metal.
- When tilted, the mercury shifts, connecting or disconnecting electrical contacts.
- This movement alters the circuit, which is then detected by an external system.
Consequently, tilt sensors provide reliable and precise measurements, making them essential for safety applications.
Applications of Tilt Sensors
Tilt sensors are widely used across different industries due to their accuracy and efficiency in detecting tilt angles. Here are some key applications:
1. Heavy Equipment & Construction
Tilt sensors maintain the stability of bulldozers, excavators, and cranes, preventing dangerous tipping.
2. Robotics
Robotic arms rely on tilt sensors for precise movement and positioning.
3. Aerospace
Aircraft use tilt sensors to monitor wing angles for optimal flight stability and aerodynamic performance.
4. Automotive Industry
Vehicles utilize tilt sensors to detect rollover risks and activate airbags or seatbelt pre-tensioners.
5. Marine & Offshore Industry
Boats and offshore platforms depend on tilt sensors for stability monitoring and safe operations.
6. Medical Equipment
Tilt sensors ensure proper alignment in hospital beds, operating tables, and patient monitoring systems.
7. Virtual Reality & Gaming
Tilt sensors enhance gaming experiences by tracking motion and orientation in VR headsets.
8. Leveling Systems
Devices like RV leveling jacks, camera stabilizers, and industrial platforms use tilt sensors for balance and precision.
Arduino Tilt Sensor Alarm Project
This project demonstrates how a tilt sensor can activate an alarm using an Arduino Uno. Specifically, a tilt sensor detects the tilt and triggers LEDs and a buzzer.
Components Required
- Arduino UNO Rev.03
- USB-B Cable
- Alphanumeric LCD (16 x 2 Characters)
- 9V Battery & Battery Snap
- Red & Green LEDs
- I2C Module
- Piezo Buzzer
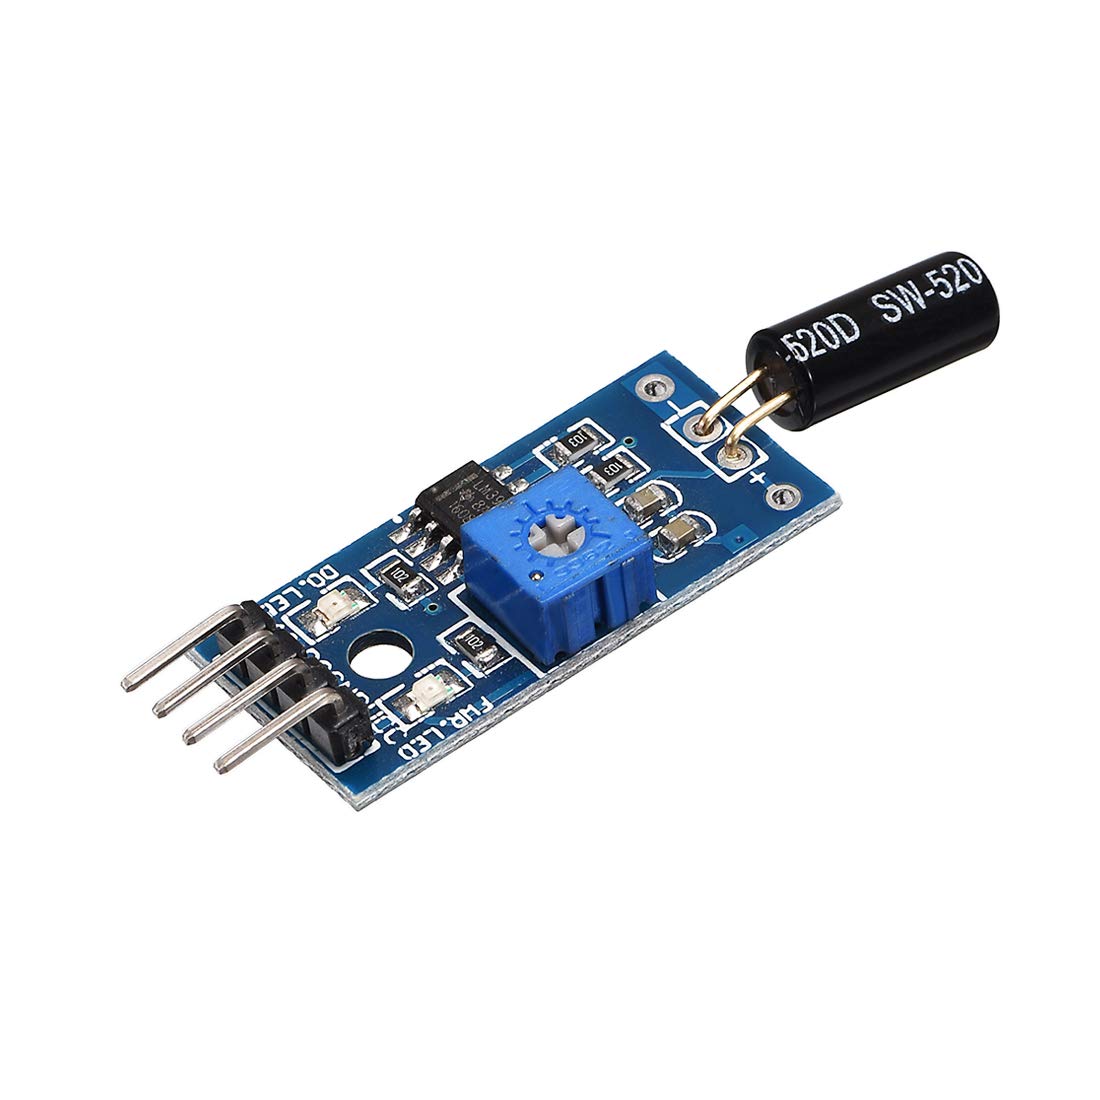
- Tilt Sensor
- 10K & 220R Resistors
- Breadboard & Jumper Wires
You can find all these components in the UNO R3 Starter Kit | Arduino IDE Compatible | Free Tutorials. Additionally, other STEM Kits such as the IoT ESP32 Starter Kit and 45-in-1 Starter Kit are available for more advanced learning and experimentation
Circuit Diagram & Setup
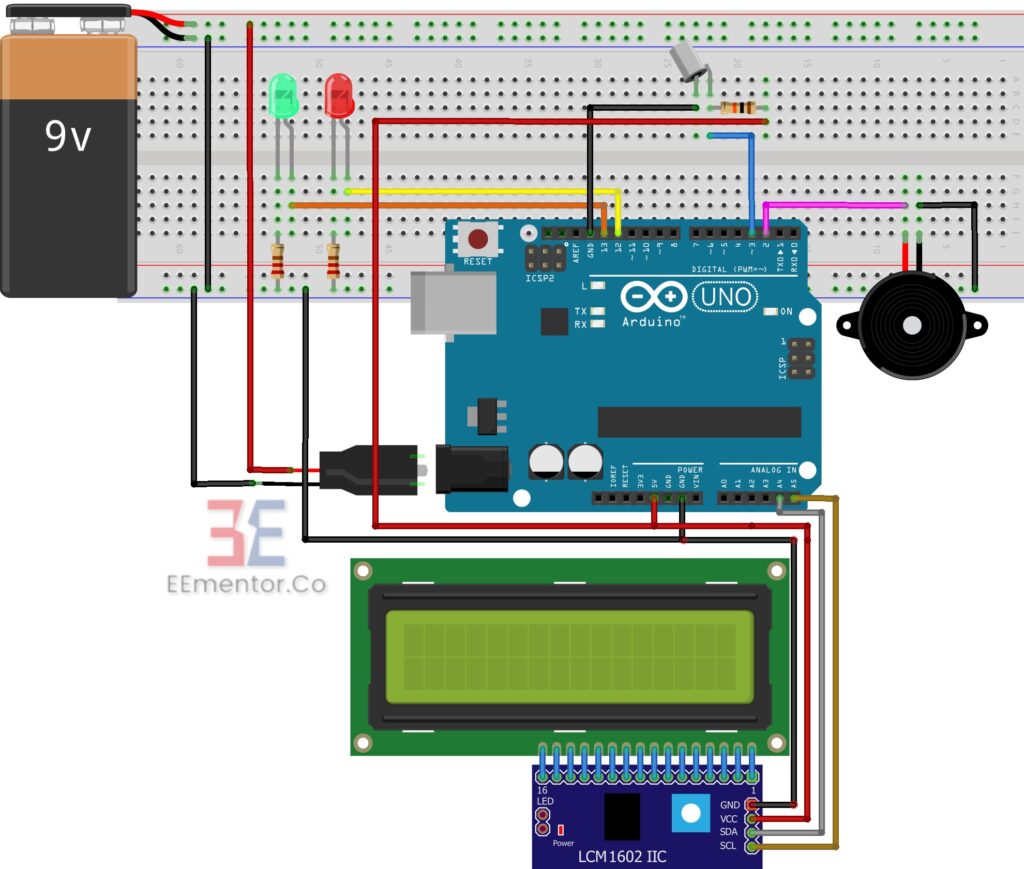
- The Arduino Uno acts as the master device.
- If the tilt sensor detects a tilt, the red LED lights up, and the buzzer sounds.
- If no tilt is detected, the green LED lights up.
- A 16×2 LCD with an I2C module displays real-time status.
- A 9V battery powers the system.
Code
#include <LiquidCrystal_I2C.h>
#include <Wire.h>
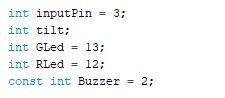
int inputPin = 3;
int tilt;
int GLed = 13;
int RLed = 12;
const int Buzzer = 2;
LiquidCrystal_I2C lcd(0x3F, 16, 2);
void setup() {
Serial.begin(9600);
lcd.init();
lcd.backlight();
pinMode(inputPin, INPUT);
pinMode(GLed, OUTPUT);
pinMode(RLed, OUTPUT);
}
void loop() {
tilt = digitalRead(inputPin);
if (tilt == 1) {
digitalWrite(RLed, HIGH);
digitalWrite(GLed, LOW);
tone(Buzzer, 494, 500);
Serial.println("Tilted");
lcd.clear();
lcd.setCursor(0, 0);
lcd.print("Tilted");
delay(200);
} else {
Serial.println("Not Tilted");
lcd.clear();
lcd.setCursor(0, 0);
lcd.print("Not Tilted");
digitalWrite(RLed, LOW);
digitalWrite(GLed, HIGH);
delay(100);
}
delay(200);
}
Code Explanation

Here libraries are called for LCD display.
Selection of input and output pins.

LCD credentials selected here.
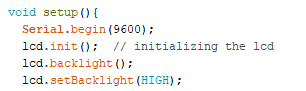
Entering to void setup and baud rate selection and initializing the LCD.

Input and Output pins declared.

Entering to void loop and reading the sensor digital value. If sensor detected high, the red led will light, buzzer also will beep for 200ms, and LCD will show “Tilted”.


Otherwise the Greed LED will glow and LCD and serial monitor will show “Not Tilted”.
This article is available in our free Ebook, which you can download from here for more in-depth knowledge and additional projects.