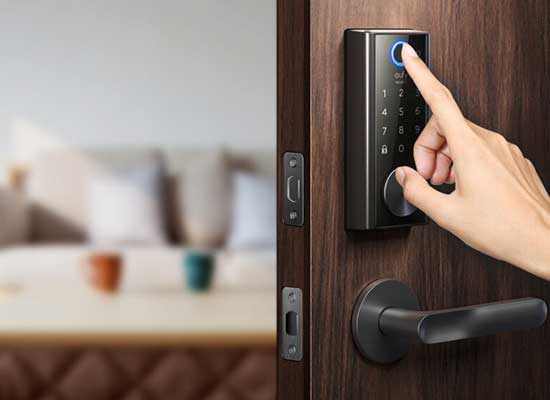
This article will show you how to make a fingerprint sensor door lock with an Arduino UNO. When the user scans the correct fingerprint stored in the system, the door will open; however, if the user scans the erroneous fingerprint, the door will remain closed. We will also learn how to use Arduino to capture or register fingerprints and then use the biometric sensor to scan them and trigger a lock.
Required Components
1x Arduino UNO
1x Fingerprint Sensor
1x 12V 5A Power Supply
1x Linear Solenoid door lock 12V
Buy this components from EEmentor Shop
Software Required:
Arduino IDE
Circuit Diagram:
Working Principle:
Here Arduino Uno works as a master device or controller device. Primarily the user will register the fingerprint or multiple fingerprints by serial monitor feedback and response. After that, when the R307 biometric sensor detects a registered fingerprint, the UNO will drive the relay module ON. The Locking mechanism will drive the locker to open, where default, the locker will be in closed mode. If there are invalid fingers on the fingerprint sensor, the locker will remain closed.
Hardware Explanation: Fingerprint sensor: Fingerprint sensor modules, such as the one shown in the diagram, have made fingerprint recognition more accessible and simpler to include in your projects. This implies that collecting, registering, comparing, and searching fingerprints is a breeze. The biometric fingerprint sensor is suitable for building a system that can secure what you need by analyzing your fingerprint. Because the device uses the serial protocol, it may be used with any microcontroller or development card (Arduino, for example).
R307 is used here as a digital fingerprint reader sensor. The R307 Fingerprint Module comprises an optical fingerprint sensor, a high-speed DSP processor, a high-performance fingerprint alignment algorithm, high-capacity FLASH chips, and other hardware and software components, with fingerprint entry and image processing, fingerprint matching, search, and template storage, among other functions.
Solenoid Door Lock: A remote door lock is known as a solenoid door lock, a device that uses an electromagnetic solenoid to latch or unlock the door. The actual locking mechanism of a solenoid door lock will, in most situations, be identical to that of a traditional key-operated model. The only difference between the two is the presence of a low-voltage solenoid in the mechanism, which when activated by a push button or other controller, pushes the latch back into the door. The latch will remain in the door for as long as the button is pressed, or forever in the case of a latching solenoid, until the button or controller is pressed again. Remote security access and car doors both utilize these sorts of door locks extensively.
Software Explanation:
First of all download the Arduino library from the following link:
https://github.com/adafruit/Adafruit-Fingerprint-Sensor-Library
and install it in the Arduino IDE.
The sensor mainly operates at 57600 baud rate, which may be changed but is the default speed. Arduino utilizes the software serial library when utilizing serial.
If changing pins is necessary, use the following instructions to do the serial by software:
MySerial SoftwareSerial (2, 3);If the Arduino is needed to do an action after discovering a fingerprint, it is vital to specify it in this piece of code:
Serial.Print (“Fingerprint Serial :”);
Serial.Print (Finger.fingerID);
Serial.Print (“and confidence”);
Serial.println (Finger.Confidence);
Write main code here
return finger.fingerID;To begin recording the fingerprints, we need to open the Arduino Serial Monitor. The initial fingerprint is saved in first location, and then we input it and the message “Fingerprint DOES match!” will appear if the fingerprint was correctly registered, followed by the address where it was saved and the message “Registered!”
For saving more than one fingerprint, the sensor supports up to 162, we must now retype the number of the next position where we want to save it, which in this case is position 2, type 2 and press enter, and repeat the process until all of the necessary footprints have been recorded, always indicating a different position so that one already saved is not overwritten.
Finally, the application that will read the fingerprints is loaded. If the fingerprint scanned matches one of the ones saved, the Arduino’s relay linked to Pin 13 will turn on for 3 seconds.
Code:
#include <Adafruit_Fingerprint.h>
#include <SoftwareSerial.h>

int getFingerprintIDs();

SoftwareSerial mySerial(2, 3);
Adafruit_Fingerprint finger = Adafruit_Fingerprint(&mySerial);

void setup()
{
  Serial.begin(9600);
  Serial.println("Finger Testing");
  pinMode(13, OUTPUT);
  digitalWrite(13, LOW);
  finger.begin(57600);
  if (finger.verifyPassword()) {
    Serial.println("Found fingerprint sensor.");
  } else {
    Serial.println("Did not found fingerprint sensor.");
    while (1);
  }
  Serial.println("Please enter the valid finger");
}

void loop()
{
  getFingerprintIDs();
  delay(50);
}

uint8_t getFingerprintID() {
  uint8_t p = finger.getImage();
  switch (p) {
    case FINGERPRINT_OK:
      Serial.println("Image captured");
      break;
    case FINGERPRINT_NOFINGER:
      Serial.println("No finger detected");
      return p;
    case FINGERPRINT_PACKETRECIEVEERR:
      Serial.println("Communication error");
      return p;
    case FINGERPRINT_IMAGEFAIL:
      Serial.println("Imaging error");
      return p;
    default:
      Serial.println("Unknown error");
      return p;
  }

  p = finger.image2Tz();
  switch (p) {
    case FINGERPRINT_OK:
      Serial.println("Image converted");
      break;
    case FINGERPRINT_IMAGEMESS:
      Serial.println("Image too messy");
      return p;
    case FINGERPRINT_PACKETRECIEVEERR:
      Serial.println("Communication error");
      return p;
    case FINGERPRINT_FEATUREFAIL:
      Serial.println("Could not find fingerprint features");
      return p;
    case FINGERPRINT_INVALIDIMAGE:
      Serial.println("Could not find fingerprint features");
      return p;
    default:
      Serial.println("Unknown error");
      return p;
  }

  p = finger.fingerFastSearch();
  if (p == FINGERPRINT_OK) {
    Serial.println("Found a print match!");
  } else if (p == FINGERPRINT_PACKETRECIEVEERR) {
    Serial.println("Communication error");
    return p;
  } else if (p == FINGERPRINT_NOTFOUND) {
    Serial.println("Did not find a match");
    return p;
  } else {
    Serial.println("Unknown error");
    return p;
  }

  Serial.print("Fingerprint Serial :");
  Serial.print(finger.fingerID);
  Serial.print("and confidence ");
  Serial.println(finger.confidence);
}

int getFingerprintIDs() {
  uint8_t p = finger.getImage();
  if (p != FINGERPRINT_OK)  return -1;
  p = finger.image2Tz();
  if (p != FINGERPRINT_OK)  return -1;
  p = finger.fingerFastSearch();
  if (p != FINGERPRINT_OK)  return -1;

  Serial.print("Fingerprint Serial :");
  Serial.print(finger.fingerID);
  Serial.print("and confidence ");
  Serial.println(finger.confidence);

  digitalWrite(13, HIGH);
  delay(3000);
  digitalWrite(13, LOW);
  return finger.fingerID;
}


